One of my favorite blogs, YHL, posted a Pinterest Challenge the other day. This little challenge gave me the push that I needed to start a project I've been 'pining' to do for a while.
I love earrings but I'm not a big jewelry wearer. I usually wear my cross/medal necklace and my engagement/wedding rings. When I want to switch things up, I change my earrings to match my outfits. Currently, my earrings were placed in this...

...a Pitt mug from college. Yes, I know...not the most elegant of things to hold your earrings in, but hey, it worked ! I've been wanting to update my earring holder for a while, ya know, make it a little more grown-up, but I haven't found the right solution until I crossed the framed radiator grate from iHeartOrganizing. I fell in love !
I did a little research and found out that Home Depot had the radiator grates. I went there and asked for a little help in locating them (I know my way around Home Depot, but not that well). The grates were actually located near the lumber section on the end of an aisle. There were huge sheets and then there were 12 x 24" sheets for about $19 each. They came in silver, nickel, and gold colors and had a few design options to choose from. I came home with two nickel coated sheets:

I finally chose the one on the left...just because. I'm keeping the other one in case a friend would like one as a gift someday or if I want to change out the grate. They are both just so pretty and delicate that I couldn't return the other one.
I got the frame at Michael's craft store on sale and with a teacher's discount for a whopping $3 (sweet !). It fits an 11 x 14" picture and had a double matte. It was perfect. I got the double matte because I needed depth in order to get the earrings to actually hang. If you use a shadowbox like frame, it would probably be a little easier.

The sheets are pretty flimsy, so I first tried to used a wire cutting tool to cut the sheet:
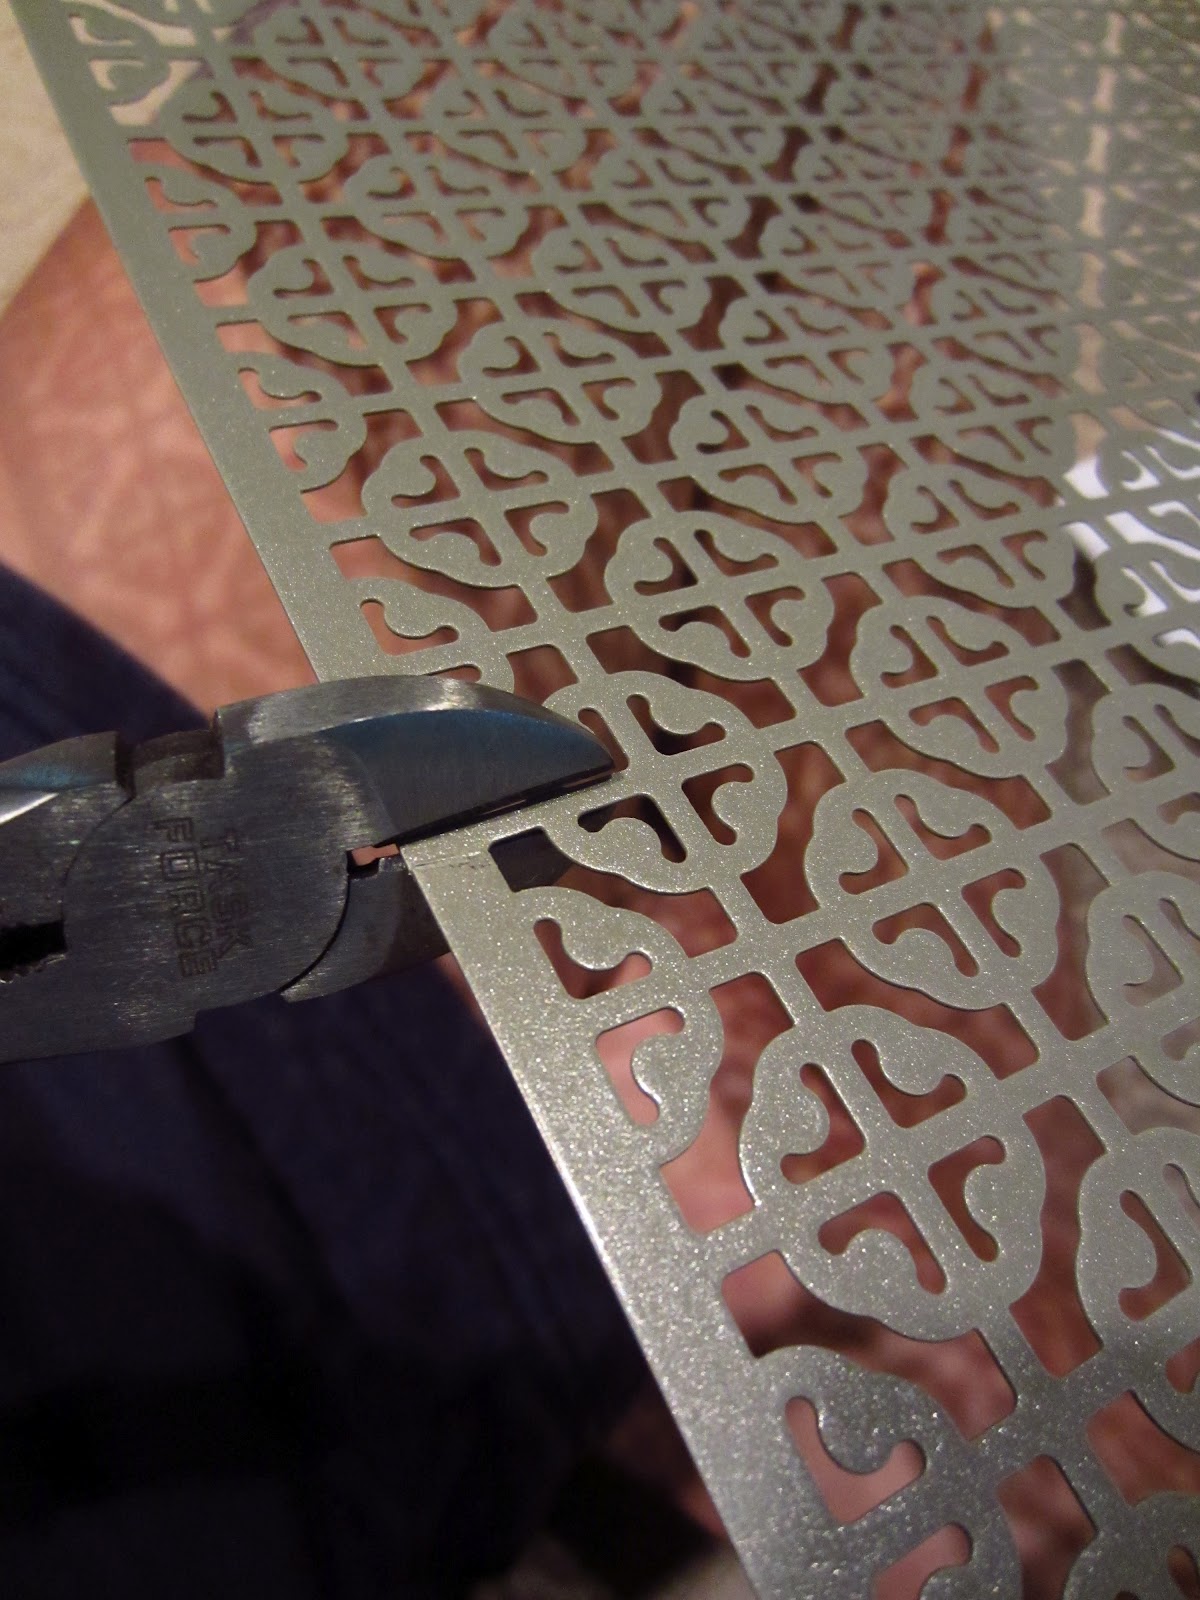
But I didn't like the way it was cutting so I just tried regular ol' scissors:

And it worked ! I only cut about 9 inches, so it was about a 9 x 12" piece. I still have 14.5 x 12" left over to use on another one !
After I cut, I used an elaborate solution to tape the radiator grate to the larger white matte...scotch tape !

Then, to add more depth to grate, I added scrapbook foam adhesives to the back of the grate:

At first I only used one foam adhesive (12 total around the frame), but after I was finished, I excitedly tried to put earrings in and it was still too shallow :( - so I doubled up on them. I used 24 all together. If you used a shadowbox frame, you probably don't need to use the foam adhesives at all.
 |
| This picture was taken when adding the 2nd set of foam adhesives...some of the adhesives stuck to the matte when I pulled it apart |
Backtracking a little: After I put the foam adhesives on the grate, I put on the smaller matte to help give just a tiny bit more depth. Then I found a pretty piece of scrapbook paper to put behind it. Otherwise you would just see the back of the frame.
 |
| Don't mind the fingernail - Yes, I sometimes bite them. |
After that, I just placed it inside the frame and put the back on. PERFECT !

Now doesn't this look a little more grown-up and stylish than that Pitt mug? I also purchased some sushi dishes a few months ago (a transition from a childhood jewelry box) from World Market to hold other pieces of jewelry and bobbi pins. Here's a before and after:

All in all, I am very pleased with the final product. Since I only used about half of the radiator grate and I got the frame fairly cheap, this only cost about $15 (not including materials I already had at home: scrapbook paper and adhesives). Nice and easy !
How and where do you store your jewelry?
Now you can Do It Yourself Too!
~Stephanie
I hopped on over from Bower Power Pinterest Challenge. I love the use of the radiator grill! I made one with burlap, twine, and picture frame. I like the artsy look of yours. Terrific!
ReplyDeleteHopping over from the Summer Challenge. Use of the radiator grill is so interesting - I've always done them using black screen: http://ceodraiocht.wordpress.com/2010/11/02/another-90s-hit/ which also holds up pretty well.
ReplyDeleteWhat an awesome idea! Wish I would have seen this before I went out and bought earring holder things. haha Too awesome!
ReplyDeleteHi! I found this blog through Pinterest, and found it INTERESTING. And I stop here, because I finally found Earring Holder was looking for. Thank you so much!! Anna.
ReplyDeleteDoes this work with stud earing as well? -- Holly
ReplyDeleteReason I ask, is because I am making this for my little girl who has a lot of stud earings. --- Holly
ReplyDeleteHi Holly !
DeleteI've only put ones with hooks on it. You could put cork behind the grate and stick the studs in the cork, but you'll have to put the backs in a little dish near it. Some backs you can push the whole way up and stick in the cork as well. Hope this helps !
~Stephanie
This comment has been removed by the author.
ReplyDelete